

Grindal worms (scientific name: Enchytraeus buchholzi) are small white worms widely used as live food for fish—especially fry and small species. Culturing them is straightforward and very rewarding if you keep a few basics right.
Spoiled fish, wrong item, or damaged package. Share proof within 30 minutes
Cancel orders before dispatch only. Once shipped, cancellations are not allowed
Grindal worms (scientific name: Enchytraeus buchholzi) are small white worms widely used as live food for fish—especially fry and small species. Culturing them is straightforward and very rewarding if you keep a few basics right.
🪱 What you need
A shallow plastic container with a lid
Substrate (choose one):
Coconut coir (most popular)
Peat moss
Foam pads (clean, non-toxic)
Starter culture of grindal worms
Food:
Bread soaked in milk
Oats
Fish food pellets
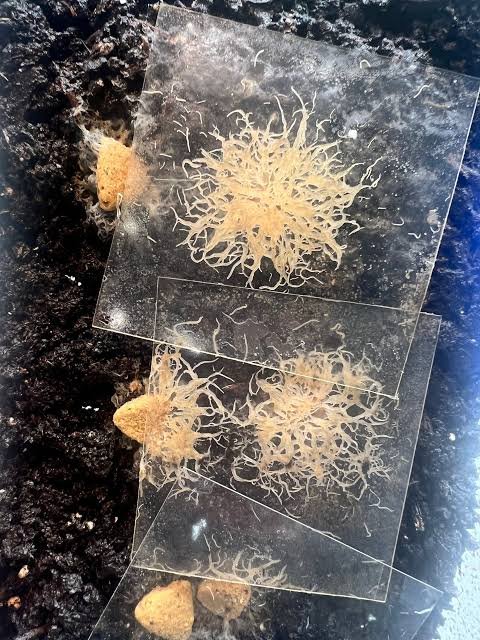
A glass or plastic sheet (for harvesting)
🏠 Setting up the culture
Prepare substrate
Moisten it so it’s damp—not dripping wet.
Fill the container about 2–4 cm deep.
Add worms
Place your starter culture on top of the substrate.
Cover & ventilate
Make small air holes in the lid.
Keep it loosely covered to retain humidity.
Add feeding plate
Place a small piece of glass or plastic on the surface.
Put food under or on it.
🍽 Feeding
Feed small amounts daily or every 2 days.
Don’t overfeed—mold and mites will take over.
Good routine:
A tiny bit of soaked bread or crushed fish pellets
If food is gone in 24 hours → increase slightly
If food remains after 2 days → reduce
🌡 Ideal conditions
Temperature: 20–25°C (perfect for places like Chennai)
Moisture: Always damp, never soggy
Keep away from direct sunlight
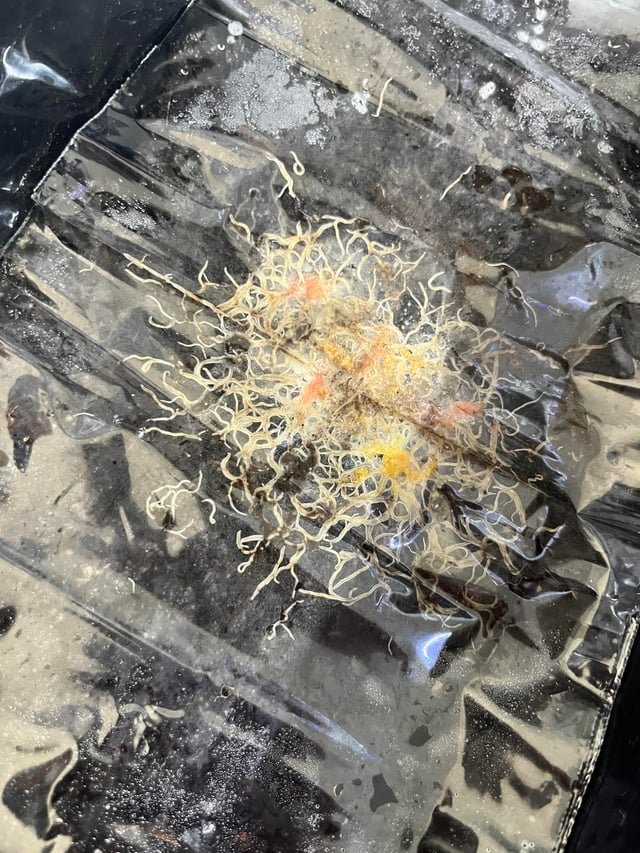
✂️ Harvesting
Worms gather on the glass/plastic plate
Scrape them off with a finger, brush, or blade
Feed directly to fish
🔁 Maintenance
Replace substrate every 3–4 weeks
Split cultures into multiple containers (backup in case one crashes)
Watch for:
Bad smell → too wet or overfeeding
Mites → reduce food, clean setup
⚡ Tips for faster growth
Keep multiple small cultures instead of one big one
Feed protein-rich foods occasionally (like fish food)
Maintain consistent moisture

Looking empty... Let's fill it with some of the best Aquarium College products!
Start ShoppingItem added to your shopping cart.
Reviews
There are no reviews yet.